Tuesday, April 30, 2013

Top 10 Home Improvement Ideas

Exterior Paint ProjectMoving into a home can open the flood gates of new creations in your mind. You instantly notice things that can get changed and improvements you would like to see. Your home is something to be cherished and taken care of. In this article you will read about the top 10 home improvement ideas, and guess what? They aren’t all trying to break your bank.


1. Energy Saving Light Bulbs


Sometimes the only improvements you want to see are the little things. Energy saving homes are becoming very popular among consumers and changing these little things can make a huge difference. Something as simple as changing a light bulb could be all the home improvement you could be looking for.


2. Home Security


When you think of your home, you think of a warm safe place. If your home does not already have a security system, this could be the time to get one. You don’t always have to rely on the security system though. You can try and place special security locks on the door, gates or fences around the yard, or even install security screens over the windows. If you are not accustomed to the jailhouse feel, try finding the security system you feel will keep your family as safe as possible.  We recommend  Premier Audio Video Designs, based in Westchester, NY.


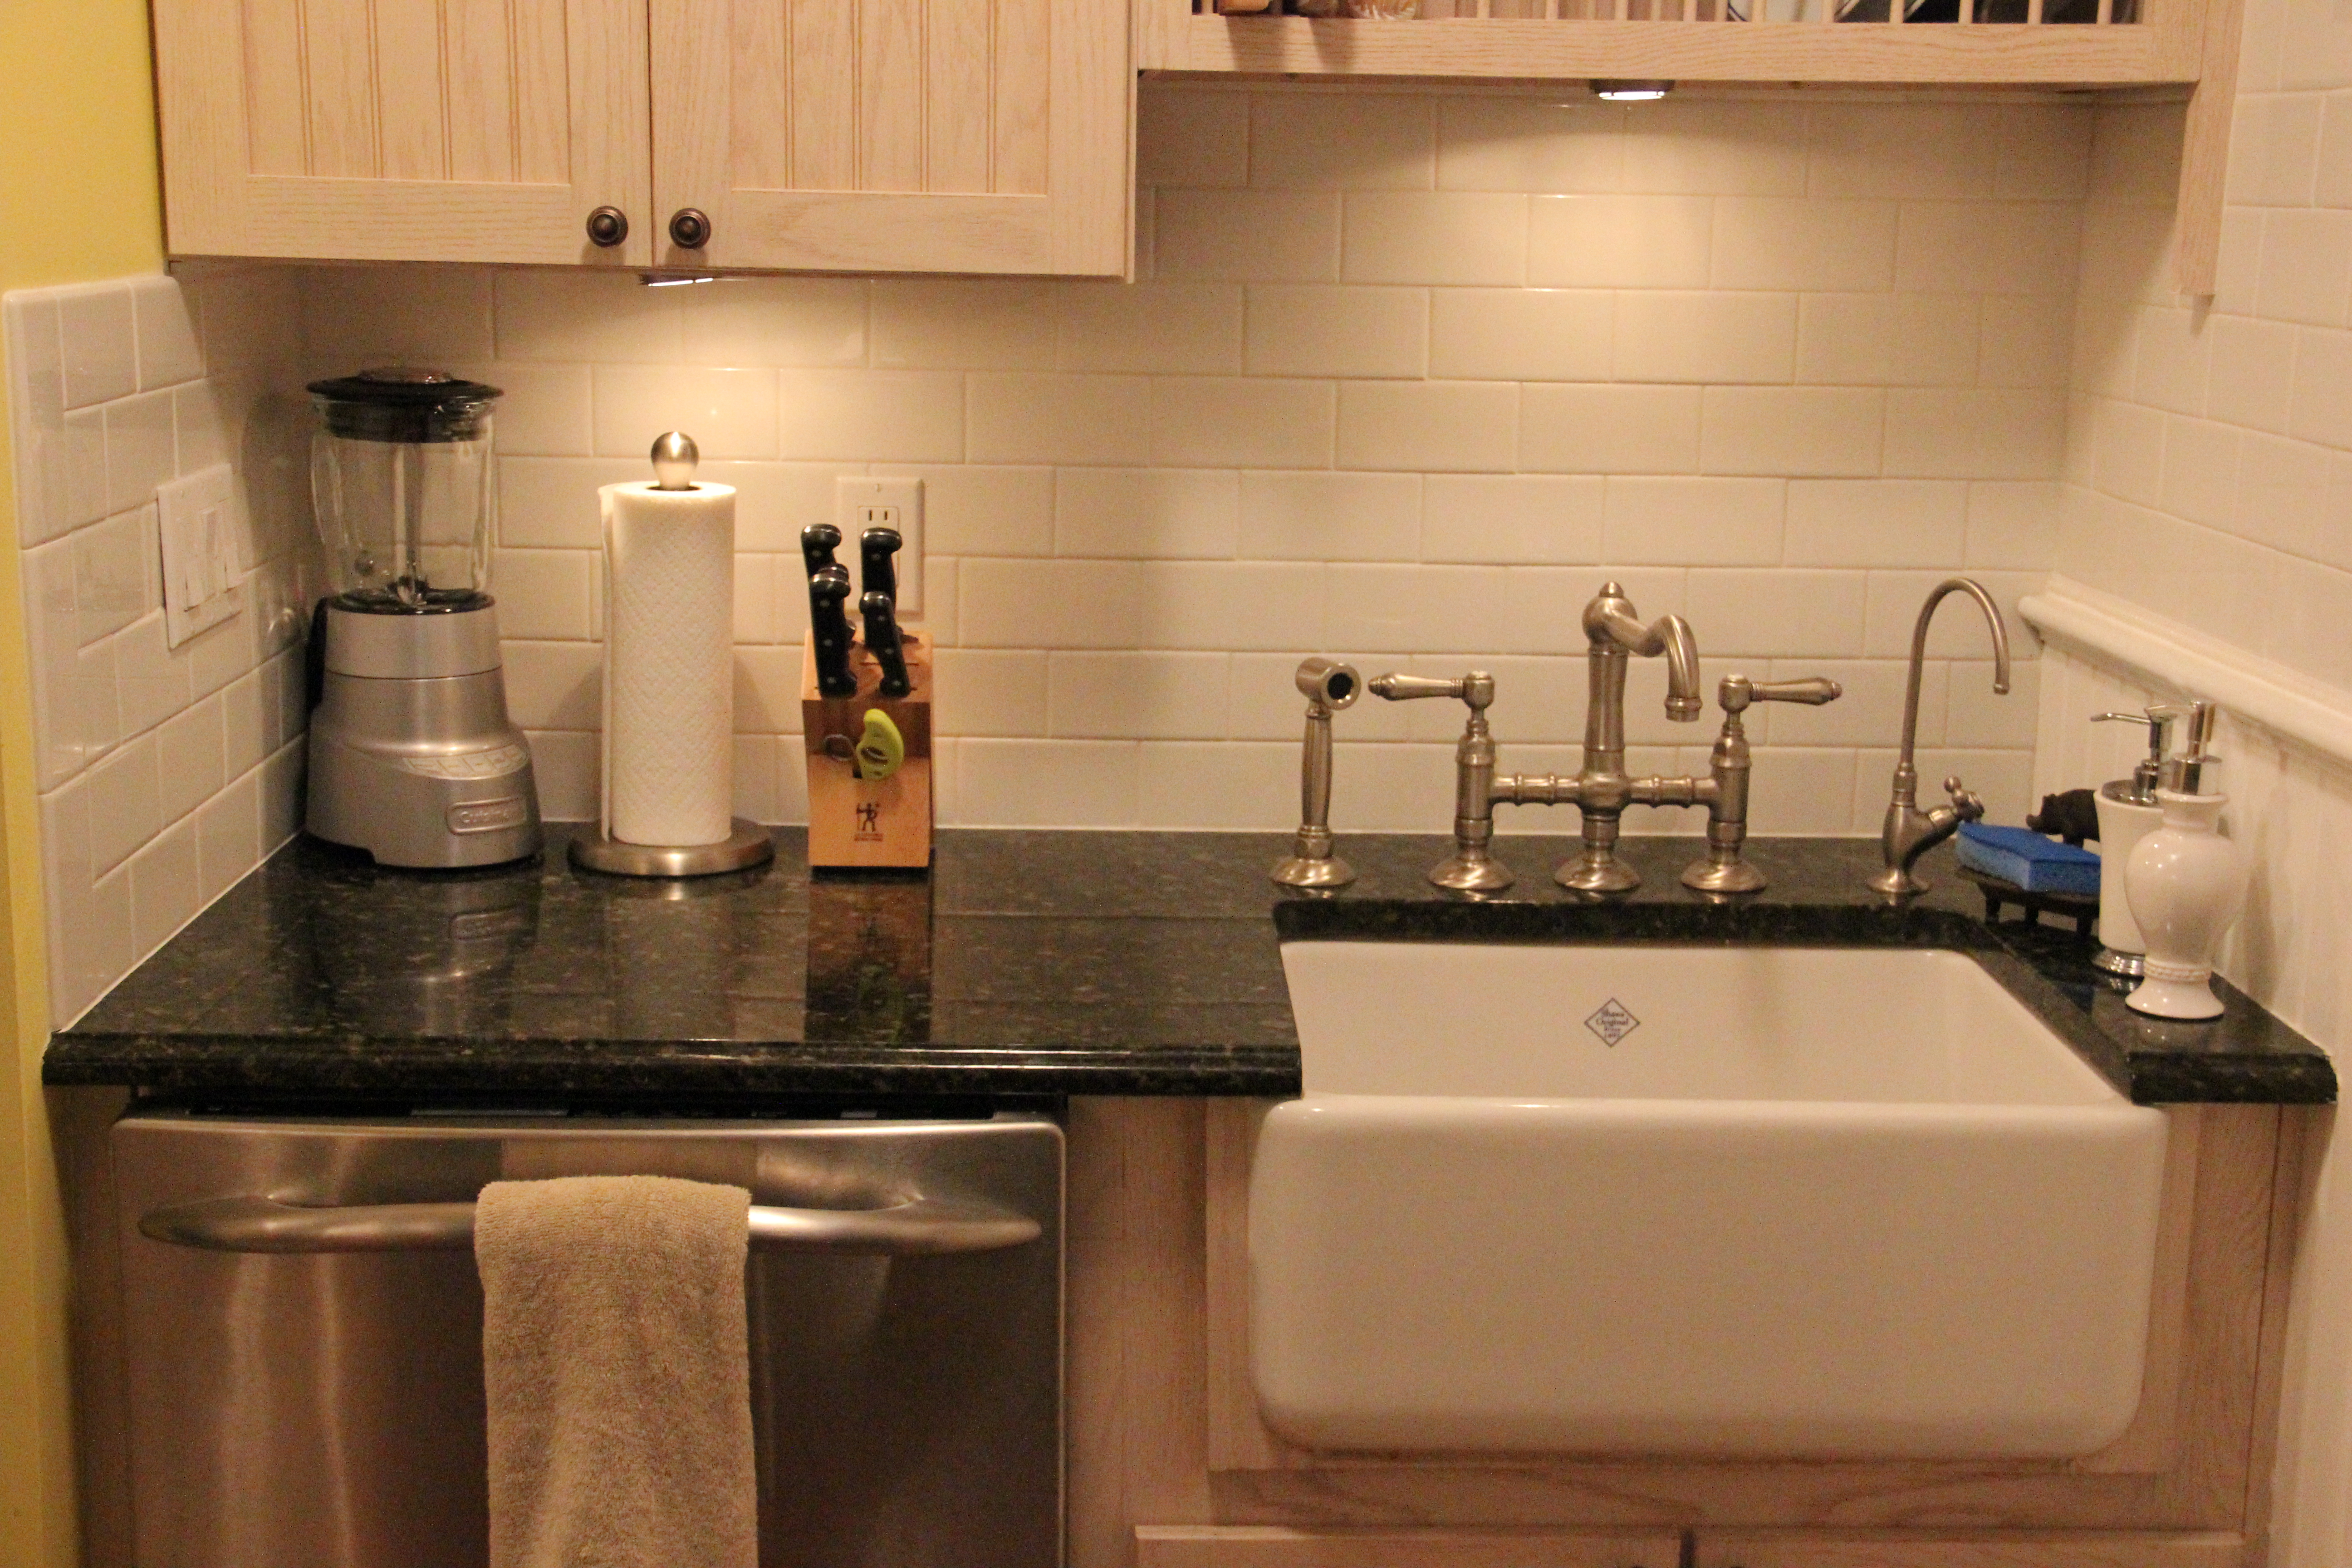
3. Replacing Plumbing Fixtures


This one might not be a task to take on alone. Waiting too long to replace your plumbing fixtures can call for more money jumping out of your pocket. Call your handyman to take a look and fix all of your plumbing issues before they leak or cause other pricey damages throughout the house.


4. Changing Paint


It is not uncommon to get bored of staring at the same colored walls all the time. Something as organized bathroomsimple as changing the colors in your house can make everything feel brand new. Make sure you start with a primer and add multiple coats of the color you have picked.


5. Storage


You can get pretty creative when it comes to storage. If you don’t have the shelf space, think about investing in something to condense everything down. Hang racks on the walls, use baskets instead of drawers, or even use metal crates for a more rustic look. Finding storage can be fun.


6. Roofing


Overtime roofs can become worn down and need to be replaced. You can even replace the roofing with a new material if you choose to go for a different look. Always remember to check the roofing. This is what keeps you dry in the storms.
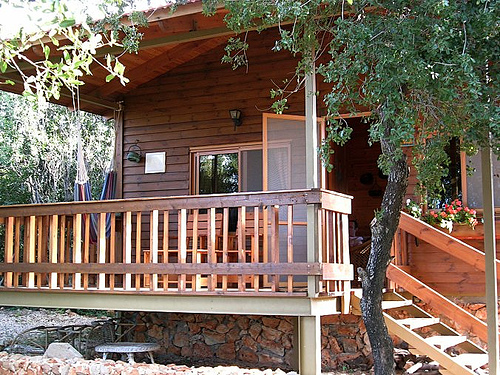
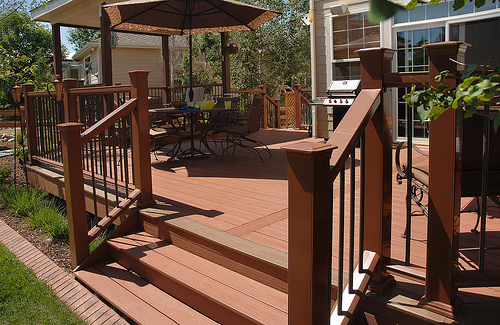
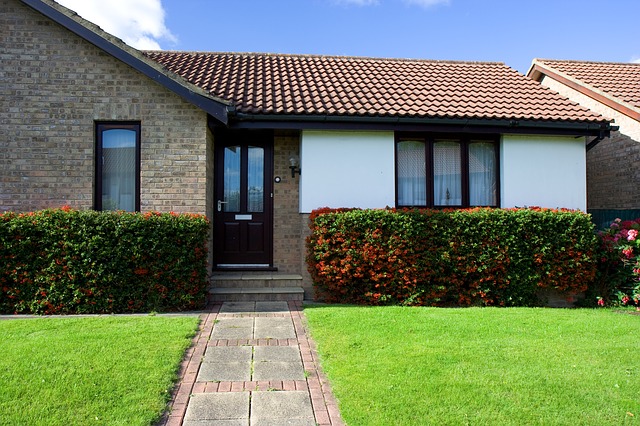

7. External Walls.


We can always get carried away when it comes to interior improvements that we forget about the Be sure to have your roof inspected twice a year
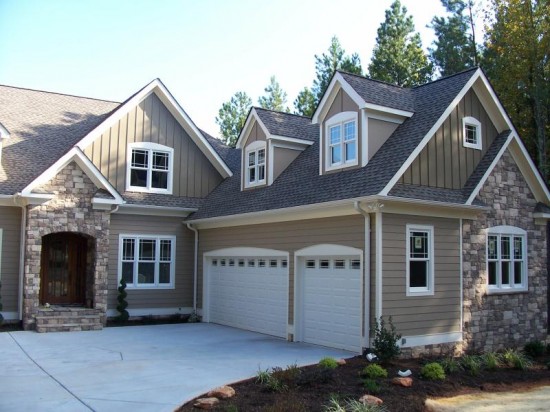
exterior. You have to think that these are the walls exposed to all the weather changes. Every once in a while make sure that the outside of your home is staying sturdy.
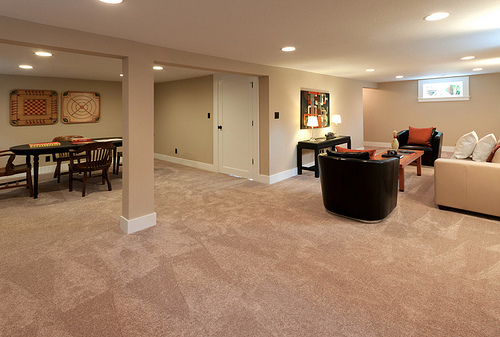
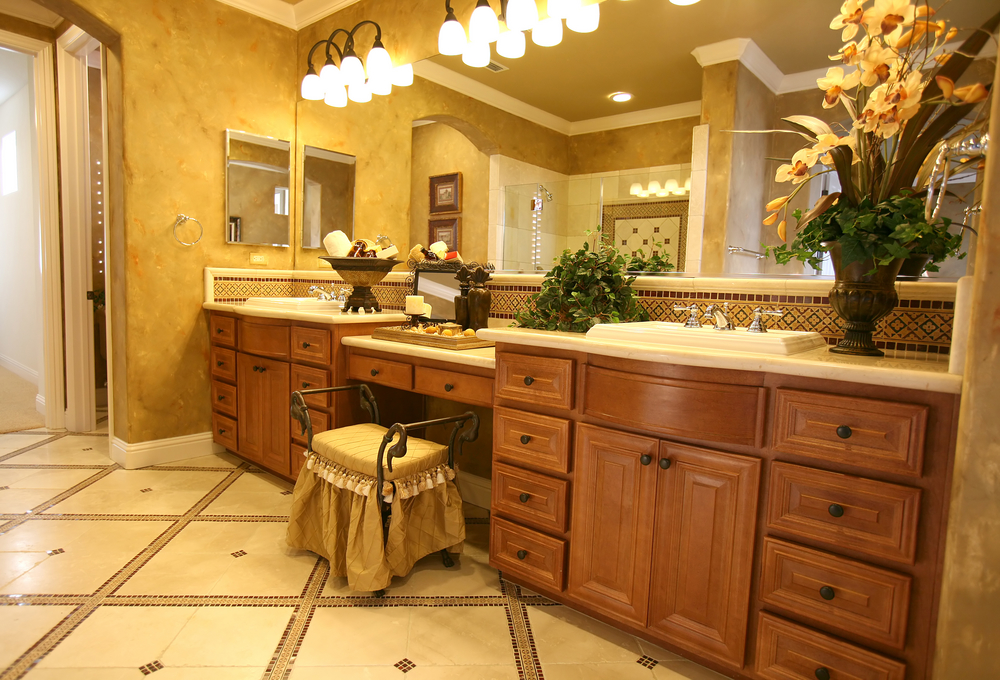

8. Redoing a Room


Sometimes we want to go for more of a larger scale project. Remodeling can be time consuming and messy, but the after effect can be all you ever dreamed. When remodeling make sure you have the time, money, and ideas ready. Looking for more cabinet space? A brighter window? Make sure you make the best use out of the area you are redoing, especially when a lot of time and money is being put into it.


9. Curtains


Sometimes all you need are a new pair of curtains. Spice up your home with a new texture or color of curtain. Your eyes will thank you.


10. Rugs


Open spaces sometimes need a little extra something to make it feel homey. Look for area rugs that match your color scheme and styles.


Guest Post By:


Selina Gough - Internet Marketing Specialist


Wednesday, April 24, 2013

Secrets Of Upcycling Success

Upcycling: Breathe new life into decor with a dash of DIY inspiration


upcycling ideasIf you’ve ever looked around your house and gotten the urge to purge, you might consider pausing and first thinking about how you could transform that old, damaged piece of furniture or outdated light fixture into a fresh-faced showpiece for your home.


Not only are you doing something good for the environment – and likely your pocketbook – by restoring something, you’re embracing your inner creativity. You can make a truly one-of-a-kind decor piece, tailored to your personality and style.


This notion of restoring and reusing items that would otherwise be cast aside to the junkyard or thrift store is called “upcycling,” and it’s a trend that has caught on quickly, especially in home design. With a little inspiration, creativity and the right tools, you can tackle countless decorating projects with things you already have around your home. And the best part? Upcycled pieces make for great conversation starters, often tell a good story and can even be sold for a much higher price than you put into them.


So where do you start? Here are some helpful tips for tackling your own upcycling projects.


Start with a little inspiration


Take a look through magazines, home design blogs and websites to gather inspiration. Look for pieces that catch your eye and have the same structure and “bones” as the items in your home that you’d like to restore.


Shop around without breaking the bank


Decorating your home doesn’t have to cost a fortune. Look around your basement, attic, or at yard sales and consignment shops for free or inexpensive items that you might be able to breathe new life into. The old adage “never judge a book by its cover” would apply here. Do your best to look beyond an item’s current condition and let the inspiration you’ve gleaned take over as you see its full potential in a different light. If the piece has some defects, don’t immediately overlook it. Sometimes perfection and personality can be found in the imperfection.


Secrets of upcycling success


The secret to any do-it-yourself project is to plan ahead. Beyond finding the inspiration for a project, gather the supplies and tools you’ll need, read up on step-by-step instructions, dedicate a roomy workspace where everything is at your fingertips, and be sure to carve out time to focus on the project.


But the No. 1 secret of upcycling success is to be patient and not get discouraged. If at first you don’t succeed, try, try again. It’s OK to make mistakes because sometimes you’ll uncover hidden beauty during the process. The important part is that you find the whole experience of restoring and reusing rewarding.


Monday, April 22, 2013

Tips To Prepare For Power Outages

prepare for power outagesStorms have been packing big punches in recent years. While the debate about the cause might rage on, so do the natural elements that wreak havoc on private homes and public infrastructure. As has been seen in recent years, the aging of the American power grid has resulted in extended power outages – and that increasingly seems that this will be the new norm. However, going without power for long periods of time is non-negotiable for many Americans.


Waiting out a power failure is only an option for so long – and for many people, it’s not an option at all. When power goes out, preparedness goes a long way. As a new season of storms looms on the horizon, consider these tips to keep your household both safe and functional, whatever the weather.


* Generate your own power. A portable generator can provide safety and comfort in both long- and shorter-term power outages. As an alternative energy source, it gives you the option to keep your household running far more smoothly than it would with no power at all. Most will power your refrigerator, fans, space heaters, room air conditioners, lights, TVs and more during an outage, with surprisingly quiet and easy operation.


* Invert for an alternative power source. Inverters are another handy, portable option for added power. They convert power from sources like batteries into AC current, which can be used to power a wide array of necessities, from medical devices to phone chargers and beyond.


* Be charged up. If you plan on using an inverter, be sure to keep batteries charged during stormy seasons. Having battery chargers on hand will help you be prepared to get through the aftermath of a power-disrupting storm.


* Keep your home supplied. A stock of candles, batteries, flashlights, first aid supplies, prescription medicines and other helpful items like duct tape and a digital thermometer will serve you well in a short-term outage, but will also be essential if it lasts longer.


* Remember food and water safety. Because tap water might become unsafe to drink, a stock of bottled water is a critical supply. If power is out for more than two hours, it’s time to start thinking about food safety. Remember that meat, poultry, fish, and eggs need to be refrigerated at or below 40 F, and that frozen food has to be kept at or below 0 F to remain safe to eat, according to the USDA.


When storms strike, it can result in chaos, no matter where you live. By taking steps to prepare ahead of time, you’ll be able to cope with power outages and get life back to normal sooner than you might have expected.


Saturday, April 20, 2013

Bathroom Makeover Ideas

Tips for Bathroom Remodeling Projects:


Bathroom Makeover IdeasMaybe you bought an older home and you found the bathroom to be somewhat outdated. Maybe your old bathroom hasn’t aged as well as it might have. Regardless of the reason, a beautiful bathroom has a good impact on your self-esteem and on the image of your home. After all, you don’t want guests visiting your bathroom thinking how dingy and bad it looks, right? Here are some useful tips you can incorporate into your bathroom makeover:


• Choose beautiful fixtures that complement your bathroom space. For example, choosing classic variations of sinks and tubs will make your space a lot more interesting. Pedestal sinks are an excellent way of adding timeless beauty.


• Lay down in a bathtub before you buy one. You have to make sure the size allows you to enjoy being in it. Depending on the space you have available, you can either enjoy a regular type or an extra-deep one. Choose a color different than white if that is within what’s available and affordable to avoid the standard bathroom look.


• Choose flooring capable of withstanding traffic. Tiles made of ceramics, stone or marble are Bathroom Makeover Ideasdurable enough and water-resistant to be a good choice for a bathroom. You can also work with laminated floors as there are many water-resistant variations on the market. Choose whatever colors suit your personal taste.


• Use the opportunity to change your mirror into a more stylish and interesting one. There are many varieties on the market that offer various styles. Pick something that suits your personal taste and change the way everything looks with this simple touch.


• If your wall allows it, try recessing any storage cabinets into it thus allowing the bathroom to become more spacious. Make sure the cabinet has enough depth and that it has a door flush with the wall where you installed it.


• Build a shower area with an open area instead of the traditional curtain if your space allows for it. It will be less confining and it will add a sense of spaciousness. You can also use a ceiling shower-head or one that is mounted high above with a lesser amount of water used so you can keep the area more dry.


Bathroom Makeover Ideas• It is important to have proper lighting around the bathroom. You can combine the usual mirror lights with wall sconces or pot lights to reduce the unlit corners. Install dimmers too if you want to have different light levels.


• While you are at it, you should buy a comfortable toilet seat. Choose one that complements your bathroom and has a comfortable seat. If possible choose one that is economic, such as the low flush variety.


• If you have the space, you can use that for a lot more! Maybe a makeup vanity, exercise equipment, a place to relax or anything you like. You are only limited by space and your own imagination! Have fun!


Guest Post By:


Bio: Cindy Davis is a dedicated writer with great flair for home improvement and home remodeling projects. She is currently focused mainly on the household cleaning and organizing field. Find some more of her helpful tips and hints here: http://www.cleanerscarpet.co.uk/cleaners/RM20-cleaning-service-west-thurrock.html


Need help with your bathroom remodeling project?  Give us a call at 914-576-2572 for a free estimate.  We specialize in Bathroom Remodeling! ~Gary B.


Thursday, April 18, 2013

What To Do (And What Not to Do) if you Find Asbestos in Your Home

AsbestosAsbestos is a frightening word for a lot of people because we are all too aware of the dangerous consequences to our health that can be caused by asbestos exposure. Yet, many of us may not be aware that asbestos is present in the home and needs to be taken into consideration when doing any DIY or remodeling tasks. Here is the low-down on what to do and what not to do if you find asbestos in your home.


What is asbestos?


Asbestos is a building material that was used in the construction of homes prior to 1980. It was often used in ceilings, air ducts, insulation, flooring and roofing materials. This naturally occurring mineral fibre was found to cause severe health problems if the spores were inhaled and so it is no longer used in the construction of buildings. The problem is that it isn’t easy to tell whether a material contains asbestos or not so anyone undertaking DIY projects in the home need to proceed with caution.


Dispelling the myths


The fact is many homes contain asbestos in their construction materials. It is easy to become alarmed at the suggestion your home may contain asbestos but there is often confusion and misunderstanding about this widely-feared material.


Provided that the asbestos is left intact and untouched and it remains in a good condition, then it should not do you any harm. It is only when the asbestos is damaged or disturbed that harmful asbestos spores may be inadvertently released and inhaled.


If you are unsure whether your home contains asbestos, then you’ll need to get a trained professional in who can undertake sample analysis for you. Never attempt to try and do this yourself as you may only disturb, damage or release the dangerous asbestos spores.


What if you find asbestos in your home?


Do not touch the asbestos – leave it alone. If you are undertaking any DIY activities in that area Be sure to prepare for home renovationsproceed with caution to ensure you don’t disturb it. Limit access to the area.


Don’t saw or drill holes into asbestos-containing materials and never dust or sweep debris that may contain asbestos. Don’t walk this material all over the house as you are increasing the proliferation of the spores. Instead, clean any offending areas with a wet mop.


If your flooring contains asbestos, then don’t use a power stripper on it or try to sand it. If you need flooring replaced that contains asbestos, then install new floor covering over it.


What if the asbestos is damaged?


Damaged asbestos requires professional intervention so always leave it to the experts. If you suspect asbestos damage, then get on it right away. It will either need repairing or removing. Repairing usually involves sealing or covering the asbestos. Removal is usually the last option as it’s a complex procedure but may be necessary if you are planning a major remodeling project to your home.


If you are unsure about whether your home has asbestos or whether it may be damaged and likely to cause harm, always consult a professional. It can never hurt to seek professional advice and be sure rather than take the risk of damaging your and your family’s health.


Guest Post By:


Article written by A. Elliott, a writer with an interest in interior design and home improvement, this article was written for Ashbrook Roofing, specialists in roofing supplies.


Tuesday, April 16, 2013

The FamCave: Part 2 – Selecting a Space For Your Family’s Entertainment

Finding the perfect room for your FamCave is very important. Here are some things to ask yourself when thinking about which area of your house is most ideal:


FamCaves do not require much space


Is there enough space?


FamCaves do not require much space. If you can fit a TV in the room, chances are, you have enough space. Things like in-wall and in-ceiling speakers offer more flexibility, since they each take up about as much space as a recessed light fixture. We have worked in rooms as small as about 10’ x 10’ and the results were quite nice.


Is the room functional?


To check if the area you’d like to use will be functional, see if it has the necessary electrical outlets, and design flexibility. You want this room to have the appropriate design feel for your family, so having the ability to add certain design elements is very helpful. The best thing to do is consult with an audio/video installer like me. A good installer will know about which products to use, based on the size of the room, where to place things, and some can even offer ideas for the room layout. You want everything to work and also be a comfortable, enjoyable place for your family to spend time. Being comfortable in the room is an important factor for enjoying it.


Make your FamCave Multi-Functional!Can the room perform its multiple functions?


Like most common rooms, FamCaves need to be able to perform multiple functions for the family. Areas for playing, video gaming, and reading are things to consider while thinking about your FamCaves functionality. The idea is for the entire family to be able to enjoy the room in their own way. It should be able to accommodate various activities.


Guest Post:


Article written by Damon Della Greca, owner of Premier Audio Video Designs, based in Westchester, NY.  Damon has been involved in pro audio since 1991 and in the consumer electronics industry since 1998.


Need help transforming an existing room in your home into a FamCave?  Give us a call or send us an email.  We can help! ~Gary B.


Monday, April 15, 2013

Introducing The FamCave

Entertainment the Whole Family Can Enjoy!


Introducing the FamCave!Most people have heard of the term “Mancave.” If you haven’t, a Mancave is a room a guy can turn into a personal hangout for him and his buddies. Mancaves often include a big screen with surround sound, so he and the guys can watch the big game. You are also likely to find gaming tables, a bar, sports memorabilia and other “manly” items he holds near and dear. Wives love these spaces because it gives their husbands their own dedicated space and prevents them from turning the rest of the house into their own version of the Baseball Hall of Fame.


Although we love the idea of a Mancave, a FamCave is a similar concept to the Mancave, except it is a common area the entire family can enjoy. Typically, this would be considered a den or family room – an area that serves multiple purposes, such as a playroom for the kids, the main spot for the entire family to watch TV, and a place to just relax and read a book when the day is nearly done. FamCaves, however, add more of the audio/video features from the Mancave. They often upgrade the technology in the room and add features like a big screen TV, surround sound, video game systems, high quality music systems and more –we call this multipurpose room a “FamCave!”


When adding a FamCave to your home, one of the most important features is the audio/video system. Many people call this a home theater, but it’s not quite a true home theater. What exactly is a home theater? Is it just a big screen TV with surround sound? No. Although these are important parts that make up a home theater, there are other things to take into account. For instance, a dedicated room with a projector with a very large (70” to over 200”) screen, high-performance surround sound, acoustical wall treatments, controlled lights or shades and luxury, theater-style seating is an honest representation of a true home theater, since it has been designed to perform more like a real movie theater does. With a slightly more basic version of these features in your FamCave, your home will have the perfect spot for your family to spend time together and really enjoy being entertained.


(This article is part 1 of a 2 part series.  Stay tuned for Part 2!)


Guest Post By:


Article written by Damon Della Greca, owner of Premier Audio Video Designs, based in Westchester, NY.  Damon has been involved in pro audio since 1991 and in the consumer electronics industry since 1998.


Need extra room in your home to incorporate a FamCave?  Give us a call at 914-576-2572!  We can discuss your options such as adding an addition or renovating your basement.


Thursday, April 11, 2013

Tips to keep your home clean and clutter free

bird feeder

After a long winter, spring is finally in sight. Before the season is in full bloom and outdoor chores pile up, take advantage of spring showers to tackle the indoors first with easy home cleaning and organizing projects. To get your home in tip-top shape, start by breaking down your to-do list room by room, so you can create an easily achievable goal that will leave your house looking fabulous and you feeling refreshed.


  • Restore beauty in the bath


The bathroom may be one of the smallest rooms in the house, but it can also be the one with the organized bathroombiggest mess. Vanities often become a magnet for clutter. Everything, from towels to toiletries, curling irons to cotton balls, can take over this space and make cleaning a nuisance. Start by reducing your items. Marry any of your multiple containers of the same product into one container. Then, recycle the empty containers to create more space.


Once your cleaning is complete, add drawer organizers, baskets and other accessories to neatly store all necessities. Then add towel bars, robe hooks and shelves as they are easy, inexpensive and decorative additions to help prevent items from ending up on the floor or countertop.


  • Clean and clever kitchens


Next, move to the kitchen, a favorite gathering place … and one of the dirtiest rooms in the house. Kitchen remodeling project, Hastings, New YorkBegin by sorting through cupboards to weed out any unused products, such as specialized appliances, expired pantry foods and containers with missing lids. If it’s broken or hasn’t been used in a year, it’s time to get rid of it. You’ll instantly achieve valuable cabinet storage – as well as eliminate objects that collect dust and bacteria.


Now, start from the top and give your kitchen a thorough cleaning – including tops of cabinets and appliances – and finish with a good scrubbing of the floors. Finally, focus on updating the germiest area of the kitchen – the sink. There are typically more than 500,000 bacteria per square inch in the sink drain alone, according to Health Magazine. And that doesn’t include regularly touched items, such as your sponge and faucet.


  • Refreshed laundry room


The laundry room, since it is often located near the frequently used garage entry, can become a catch-all for everything from cleaners to coats, and shoes to shop vacs. Free yourself of this clutter by organizing and giving everything its proper place. Items often get stashed on the horizontal surfaces – such as the floor or on top of the washer and dryer – so look to the vertical surfaces of the room to create new, more appropriate places.


Adding wall cabinets is an ideal place to add storage (and keep things neatly hidden). Wall hooks dedicated to each family member can neatly hold coats, scarves and bags. Installing shelves in the coat closet can provide additional room on top and below the garment bar. Over-the-door storage racks can house frequently used items, such as brooms or shoes.


With a few upgrades and organization to key rooms, your home will look its best and the new-found organization will energize your spirit just in time to enjoy the spring season.


Wednesday, April 10, 2013

Tips for optimizing small spaces

Tips for optimizing small spacesThe trend toward smaller, more efficient homes is still in full swing, with new home builders offering floor plans that lower square footage while amping up usability. If your home is older, however, or you live in an apartment, your smaller space may just feel … well, small.


Being short on space doesn’t mean you have to be short on style or efficiency. Even older small spaces can get an open, useful feel with the right design and decorating tactics. Here are a few ways you can optimize your small space:


Be size wise


Nothing makes a small room look more cramped than filling it with furnishings that are too big for the space. For example, if your living room is 10 by 12, a 9-foot-long sofa is going to dominate the room and leave little space for anything else. Conversely, placing a smaller bed (such as a twin or single) in a modestly sized bedroom is a classic trick designers and home stagers use to make a bedroom look larger.


When buying furniture for your small space, keep scale in mind. Furnishings should fit the space well, leaving plenty of area for you to move around them.


Open up floor space


Smart use of wall space can open up floor space, which is often at a premium in small rooms. Some items must occupy floor space, such as sofas, tables and chairs. Others – like lighting, TVs and electronic components – don’t.


Wall-mounting TVs, especially flat screens, can be a great way to conserve floor space and create an appealing focal point for a petite room.


Work with your walls


Your walls can work for you in other ways, too. Even in small rooms, the walls are one of the largest spring home designsdesign elements. Choosing a bright or light wall color can help a smaller room feel more open and airy. Adding mirrors is another way to make a room appear larger. You don’t need to install a full-length mirror on one wall; a series of smaller mirrors attractively positioned in a cluster can do the job just as well without being overwhelming.


Carefully consider accessories you place on the wall, and don’t overdo it. Too much on the walls will make them look cluttered and even smaller. Sometimes, one or two thoughtful graphic elements are all you need to make a design statement.


Let there be light


A lack of lighting can make a small room look positively cramped. Whenever possible, enhance the size and appeal of your rooms with plenty of light. Natural light is optimum and adding a skylight or updating older windows to newer, larger windows is a great way to bring sunshine into your home.


If that kind of renovation isn’t in your budget, however, maximize natural light by keeping window treatments light and open. Avoid dark colors around windows, as darker hues absorb more natural light. Recessed lighting overhead can help a room feel loftier, and wall sconces provide illumination without occupying valuable floor space.


When it comes to home decorating, bigger isn’t always better and smaller doesn’t have to mean cramped. With the right blend of furnishings, colors and accessories, it’s possible to live large in any small space.


Monday, April 8, 2013

Stylish stairs

Five can-do ideas that add personality


Home improvement, remodeling and renovations are our specialties!Stairs are no longer just a way to get from one floor to another. Realizing that staircases are quite often major focal points in their homes, homeowners are showing love to this once under-appreciated space with a wide variety of creative and easy updates.


Add personality and perk-up the daily climb in your home with these five do it yourself projects.


Walls that wow


In most homes, the staircase is the centerpiece of your entryway and serves as the first impression. Transforming this space into an extraordinary one is easy by painting a bold accent wall. To add extra panache and go beyond the expected look of one solid color, paint the wall next to the stairs or the landing with an eye-catching pattern using a premium painter’s tape, like FrogTape Multi-Surface. Pick a pattern that packs a punch, like an all-over diamond motif, geometric shapes, or classic stripes, which complement staircases well.


Dazzling photo display


If you already love the current color on your staircase wall, you can easily add a personal touch by creating a photo gallery. It’s easier than ever to find inspiration and instructions for this project – simply visit Pinterest.com to view countless ideas and find one that works with your design style and space. The key to creating an impressive photo gallery is to keep one element consistent throughout. Whether it’s the color or material of the frames, or the shading of the photographs, having a uniform component allows the finished product to look polished and intentional, instead of haphazard.


Rethink risers and steps


For an unexpected update, focus your attention a bit closer to the floor. The area of your stairs that really takes a beating are the risers. Breathing new life into them can be accomplished easily with a fresh design. No need to stick with neutral shades. Risers are the perfect place to tie in a daring pattern. Opt for a chevron or Moroccan design with colors consistent with your home’s interior to achieve your decorative stairs.


Another stair expression is to apply a haute pattern directly on your steps for a faux carpet runner look. Paint your stairs with the base color of your choice and opt for a diamond motif or patchwork design. Be sure to protect your work with two coats of polyurethane when your design is complete.


Modern touches


The spindles between the treads and banister on a staircase are there to protect people – especially children – from falling off the sides, and are an easy item to swap out for a more up-to-date look. Simply remove the old spindles, which are typically held in place with a few nails. Clean up the wood around the spindle holes and scrape off any old stain, dust, dirt and sand around the tread for a tighter fit.


When shopping for new spindles, choose from these styles to take your staircase from boring to extraordinary:


* Swirls to add a hint of elegance


* Spindles with shapes such as diamonds or squares


* Outwardly curved designs


* Twisted styles


No more wasted space


Reclaim unused space under a staircase by adding storage. If it’s hollow underneath, remove the Hand Made Oak Stairs with Rails_White Plainsdrywall to create an instant mudroom by installing cubbies to store coats, shoes and other items. Another option is to transform that once wasted space into a nook to meet your family’s needs. Whether you long for the perfect spot for reading, a desk to keep paperwork and bills organized, or a secret play space for kids, the ways to utilize this area are endless.


With a little inspiration and elbow grease, it’s simple to add the perfect dose of personality to your staircase.


Think your staircase is so outdated that none of these tips will really do the trick?  Give us a call and we can discuss building a new staircase for you designed by you and truly make it a focal point in your home!


Saturday, April 6, 2013

Mold growth in your home

Take control and mitigate mold growth in your home


moldDamp, dark areas of the home, such as an unfinished basement, can often be trouble spots for homeowners hoping to increase their living space. Left unfinished, these areas of the home can potentially suffer significant damage, be prone to flooding or develop mold. When it comes to home improvement, homeowners are wise to consider the affects of moisture and mold buildup and how they can be combated.


Mold growth, usually a result of excess moisture, also can be detrimental to one’s health. The Center for Disease Control and Prevention says that mold can survive in almost any conditions, and can cause visual, respiratory and even skin problems. Mold growth can also contribute to poor indoor air quality.


Homeowners looking to turn an unfinished basement into a liveable space or take control of mold finished basementgrowth can help protect their home from unexpected expenses later on, and also add value to their home. There are several techniques to control moisture penetrating their home. The U.S. Environmental Protection Agency suggests homeowners consider techniques that manage water outside the foundation walls, ensure that the home is properly ventilated with exhaust fans in at least each bathroom and the kitchen, and size the home’s air conditioning unit correctly. Homeowners are also recommended to use construction techniques that can help control water, air movement, vapor diffusion as well as condensation.


More often than not, mold is found in homes that do not have adequate insulation. As moisture builds up within walls, the interior of the walls can start to slowly rot. This rot can emit a foul smell and eventually reduce the stability and quality of the home. Homeowners who want to address moisture and mold growth should consider a complete solution that halts future opportunities for mold growth and prevents potential costly repairs in the future.


Using a modern insulation material such as spray foam insulation is one solution that can assist. As a vapor-permeable material, spray foam insulation allows moisture to travel through it, enabling it to dry completely. Additionally, spray foam insulation is not considered a food source for mold, thereby quashing the probability of further mold growth. Properly insulated wall cavities and crawl spaces control moisture, minimize air leakage, save on energy bills as well as improve occupant comfort.


Getting to the root of mold issues is critical for any homeowner looking to add investment value to their home. A material like spray foam insulation can be applied within seconds to the walls, ceiling and floors of a basement to plug any cracks or gaps to deliver immediate results.


Thursday, April 4, 2013

DIY Decks

Five tips to upgrade your outdoor living space for summer


DIY deck projectFrom grilling and dining to simply relaxing, your home’s deck is frequently the center of family life during warm weather months. That’s why there’s no better time to give your outdoor living space the upgrade it deserves.


Whether you’re building a dream deck from scratch – or sprucing up an existing space – here are five tips for do-it-yourselfers who want to start turning their outdoor living aspirations into reality this weekend.


No. 1 – Discover your inspiration


Your deck is a natural extension of your home and your style. Think about the type of design elements that will best fit your family’s activities and complement both outdoor views and the layout of your yard. Flip through favorite magazines to find photos that jumpstart your inner designer, go online to experiment with virtual planners that allow you to try out different colors and configurations or use mobile apps to create outdoor living space designs anywhere at any time.


No. 2 – Choose materials manufactured to last


If you’re investing in a brand new deck, select materials that will stand up to years of wear and tear DIY deck projectfrom kids, pets, dropped grilling tools, heavy outdoor furniture – and even the harshest of weather. New high-performance wood-alternative decking like Trex Enhance combines superior durability and long-lasting good looks. With Trex’s protective shell technology, it’s also resistant to fading, staining, scratching and mold – while offering hassle-free maintenance. -


Combining enduring beauty and performance – but priced at a value that appeals to do-it-yourselfers – Trex Enhance decking offers the additional peace of mind of a 25-year limited fade and stain warranty. It’s also available in stock at The Home Depot stores, making it even easier to begin building your outdoor oasis this weekend.


No. 3 – Look for easy-to-install solutions


Installing a new deck may seem daunting at first, but with the proper tools and resources, you’ll not only save money on labor costs – but you’ll also take pride in knowing you successfully completed a home improvement project with your own two hands. As you create a list of essential materials for your project, think about incorporating a hidden fastener system – rather than traditional nails or screws. Hidden fasteners can make the installation of decking boards easier and faster and create a more professional look. Your deck’s surface will be smooth, seamless and more comfortable underfoot.


No. 4 – Consider a deck makeover


If your budget doesn’t allow for a complete deck rebuild this year, you can resurface an old wooden deck that’s starting to wear, warp and rot with new higher-performance materials. Simply remove the existing boards and check that the sub-structure remains sturdy before installing wood-alternative decking. Giving your wood deck a facelift with durable, beautiful composite materials will increase curb appeal, lengthen its lifespan and cut down on maintenance requirements for years to come.


No. 5 – Add finishing touches


Even if you’re already the proud owner of a gorgeous outdoor living space, take style and comfort to New Rochelle: patio and pergola additionthe next level with weekend warrior-worthy projects. Add new modular railing in contrasting or complementary colors to create a perfect frame for your deck, or establish cozy conversation nooks with weather-resistant furniture. Construct an elegant pergola to lend shade from the harsh summer sun and install energy-efficient deck lighting to create ambiance for twilight cocktail parties.


No time to install a deck yourself?  No problem!  Give us a call at 914-576-2572 and we’ll be happy to give you a free in home estimate.  We do decks using all different materials depending on what suits your taste.


We can also add a beautiful Gazebo or Pergola to enhance your outdoor entertaining experience!


Wednesday, April 3, 2013

Tips To Resolve Heat Loss

5 Tips To Help Prevent Heat Loss In Your Home


Resolve your heat loss problems and save money!A lot of us are facing large temperature changes this winter in our homes and work places that make us feel uncomfortable. We find ourselves complaining about “the chill in the air”. As a result, we tend to turn up the thermostat and burn through our heating fuel or gas as well as our bank accounts!  Alternatively, we purchase space heaters which increase our electric bills.  As a last resort, we bundle ourselves in layers of clothing to the point of looking and feeling like a lumberjack!  Surely there must be a better way.


Your home is probably losing heat when it’s cold outdoors.  If you detect where the heat in your home is being lost, you will be able to make it more energy and heat efficient as well as more comfortable for you and your family.


Improving your home’s insulation is one of the most worthwhile energy efficiency methods you can try. To give you more ideas, here are several tips on how to resolve your heat loss problem at home.


Tip # 1: Wall insulation


Did you know that heat escapes in many poor insulated homes through the walls? Wall insulation serves as a blanket which prevents heat from escaping. It can also help reduce the hot temperature in your home on summer days. You can actually carry out wall insulation on both solid and cavity walls. You may want to work with a professional to insure that the work is done to code and any necessary permissions are obtained.


Tip # 2: Window insulation


20% of your home’s heat goes out through the windows. That is the reason why insulating your windows is important. Double glazed windows could be the best option to consider due to its impressive insulating properties. It can help you resolve your heat loss problem.


Tip # 3: Loft insulation


25% of heat also escapes through your roof or loft. When insulating your roof and loft, you will be able to save heat loss as well as reduce your monthly heating bills. The effectiveness of loft and roof insulation is at least 40 year.


Tip # 4: Avoiding Window Condensation


Condensation on your windows is not good. Excess moisture develops mold growth and stain on home improvement new windowsyour windows. It could eventually destroy your window and the mold may become worse. If the condensation continues, consider a dehumidifier as an option to resolve it. You may also utilize curtains to avoid window condensation on your windows or replace them with a new window.


Tip # 5: Draught proofing


If there are gaps in your window and doors, then you probably have draughts which also cause heat loss. To prevent this, visit your local home improvement store and ask someone for assistance.  There are many different products that you can purchase and install to reduce heat loss.  If you don’t feel comfortable with DIY projects, you should call a professional to make these repairs for you..


Restore comfort and increase energy efficiency at your home. If you want to solve the heat loss problem in your home, you can use any or all of these tips. Once you succeed in preventing the heat loss through your walls, windows, lofts and floor, you can restore coziness in your home and maintain a consistent home temperature.


Guest Post By:


About the Author:


Louise Sutton is the content manager for Window Info – a Kent, England-based home improvement resource center specializing in double-glazing replacement doors and windows.


One of the most common reasons for heat loss are old drafty windows.  Give us a call or contact us for a free estimate to have your windows replaced with updated, insulated, eco-friendly windows!


~Gary Bruzzese


Tuesday, April 2, 2013

Bedroom Home Improvement Tips

Bedroom Home Improvement TipsBedrooms are the inner sanctum of a home; the most personal and close expression of who we are as people. The home improvement of a bedroom begins with the removal of excess, obsolete items who lost their functionality or relevance. You can begin the process by cleaning out your closets of any useless clothes you won’t wear. Overhauling your entire bedroom requires a bit of sacrifice. Letting go of the old is required to open up the way for anything new you want to implement in your bedroom. Here are some tips on what you can do to get your bedroom completely changed and turned into something wonderful:


Colors


It is important to pick the right colors for your bedroom. Whether you will be following a designer’s ideas or your own instincts, it is essential you pick colors which are neutral and soft so you can truly relax in the most intimate of places around your home. Warm colors will bring about a sense of serenity that is a must in any bedroom.


Headboards


You can refresh your bed by changing the headboard you have already. It will give it a new, fresh look and a renewal Bedroom Home Improvement Tipsthat makes the bed look new. You can go for prints, patterns or even a portrait made specially for you by a master craftsman. Whatever the case, you can make it something special to decorate your bedroom giving it a personal touch that won’t be forgotten.


Declutter


You should get rid of any old furniture that has become too worn and damaged and instead opt to invest in something better and more recent. If your space and budget allows it, you should go for a large queen or king size bed. Nothing can compare to having plenty of space to relax on. Combine that with interesting bed sheets with colors of your choosing and different patterns. Allow yourself more storage space with bed tables and nightstands that fit the new space.


Storage


If your room has enough space to allows it, you can turn your existing closet into a comfortable walk-in closet. It is a perfect self-storage solution EC4 and will add more character to the room as well as appeal and practicality. Check with a professional if you’re not sure how you can achieve that.


Change your curtains and windows


Bedroom Home Improvement TipsIf you add some great-looking decorative curtains that fit the overall colors and theme of your bedroom, you will conjure up a bright, fresh image. If the room is too dark you can even consider installing a new window if that is possible.


Accessories


Adding some decorative accessories will add character and life to your bedroom. Checking out what’s available on the market will let you choose something that fits your personality and tastes, though you should still stick to softer colors and a less vibrant environment. Bedrooms are a place for relaxation after all and bright colors will only energize you. Make sure you pick furniture and accessories that follow this guideline if you want to have a good night’s sleep.


Guest Post By:


Bio: Ella Andrews is writer and blogger with great flair for home decoration and home maintenance themes. Ella is constantly searching for new sources of inspiration. Therefore she is presently focused mainly on stylish and sophisticated bedroom decoration thematic.


Monday, April 1, 2013

Tips For A Healthy Lawn

Five environmentally friendly ways to keep your lawn looking great


Five environmentally friendly ways to keep your lawn looking greatMaintaining the perfect lawn is easier than you think and with the right tools, you can be both efficient with your yard work and eco-conscious. If it’s lush green turf that you’re after, but you also care about your carbon footprint, there are a few tools and practices that can help you have it both ways.


Many of the tips for maintaining a truly green lawn can also save you money and time. As you’re gearing up to enjoy your outdoor space this season, here are a few suggestions to follow for a healthy lawn you can feel good about:


* Give back to your lawn. One of the best treatments for your yard is to let a layer of lawn clippings settle on the top of your turf after mowing. The clippings decompose and replenish your soil, encouraging positive growth. A common misconception is that leaving the clippings on top of your lawn leads to the development of thatch, when in fact it’s usually caused by other conditions. Leaving your clippings only helps your lawn, and lessens the amount of work you have to do.


* Go green with battery-powered mowers and lawn tools. Gas mowers’ engines don’t run nearly as clean as more thoroughly engineered car engines and contribute significantly to air pollution, according to the Environmental Protection Agency. If you make the switch to a battery-powered mower, you can start it easily every time without having to worry about polluting the air. You can also try battery-powered string trimmers, hedge trimmers and leaf blowers, making it possible to take your entire arsenal of lawn care tools off gas for good.


* Be wise with your water. With a few strategic adjustments, you can significantly reduce the amount of water you use to keep your lawn healthy. Water less frequently with a good soaking each time, the water you use will go further. Watering in the morning will also help your lawn soak up the water, rather than having it evaporate before it makes it into your soil. Installing a rain barrel is also a great way to reuse the water that runs off your house without ever having to turn on the spigot.


* Buy a discerning fertilizer. Chemical fertilizers might offer quick results, but organic fertilizers often provide more staying power as they focus more on improving soil quality rather than the quick fix of applying nutrients directly to the plant. To make sure you are effective with your fertilizer use, take a soil sample to a local garden store to analyze it and they’ll recommend the best fertilizing mix for your lawn.


* Allow your lawn to protect itself. Mowing too short is a key mistake many people make. A good rule of thumb is to never cut more than one-third of the current height. This will ensure that your grass can develop deep enough roots to thrive and won’t get scorched when summer temperatures arrive.


Do you have any environmentally friendly tips on lawn care that you would like to share?  We’d love to hear them!